These notes describe how to make Lighthouse magnets using Microsoft Home Publishing 2000. Before you begine, you'll need a few key supplies:
Once armed with these supplies, you're set to begin. Let's go!
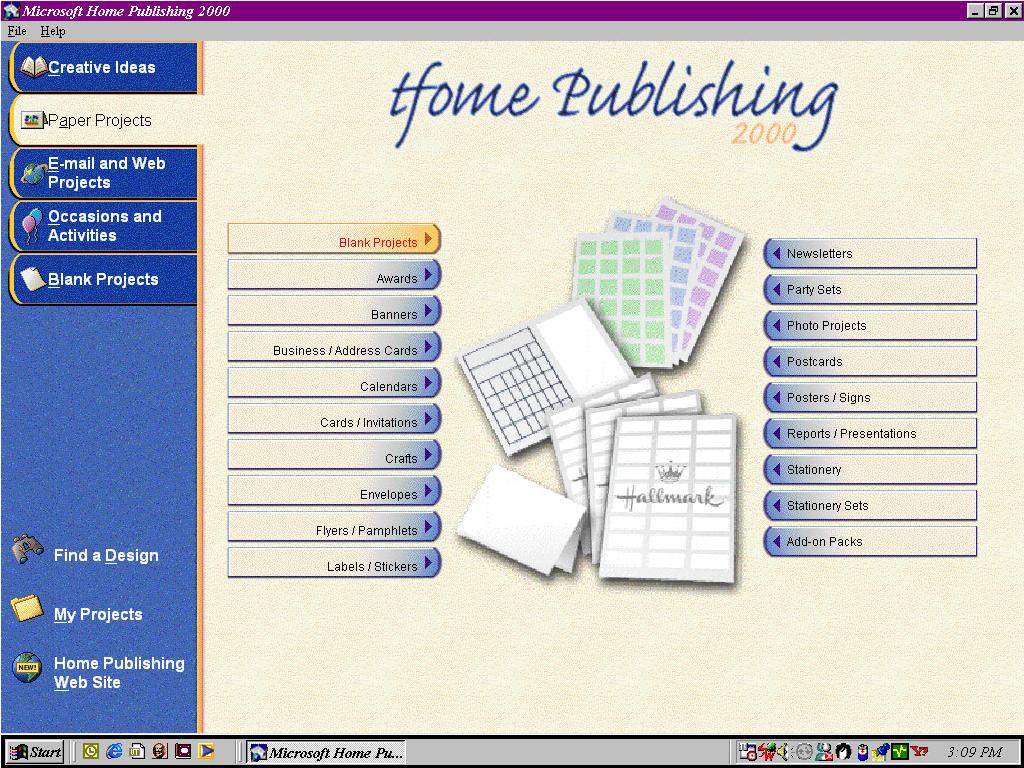
Step 1 - Select a project |
Step 1 |
Note: Click on the image to view a larger -- and probably more legible! -- version. Then click the back button in your browser to return to this page.
On the Paper Projects screen, you want to select Blank Projects.
Step 2 - Select paper |
Step 2 |
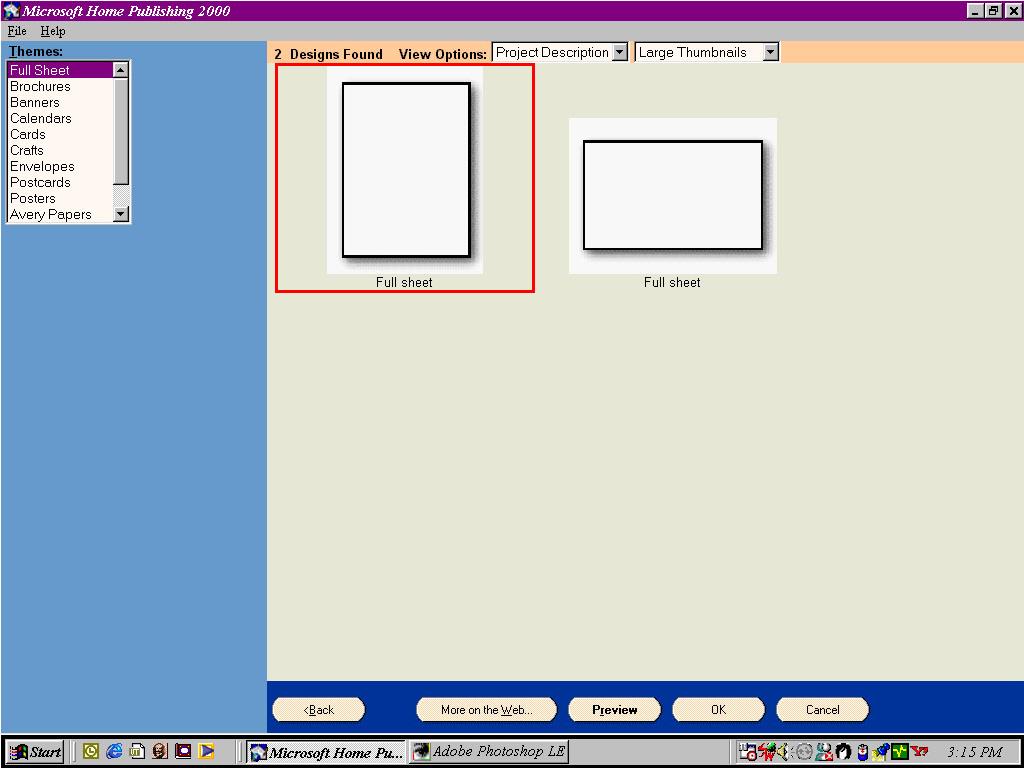
For magnets, let's use the tall full sheet.
Step 3 - Add a picture |
Step 3 |

To insert one of the lighthouse images, on Main Options, click Add something, click Picture from another source, and then click My computer.
Step 4 - Select a lighthouse |
Step 4 |
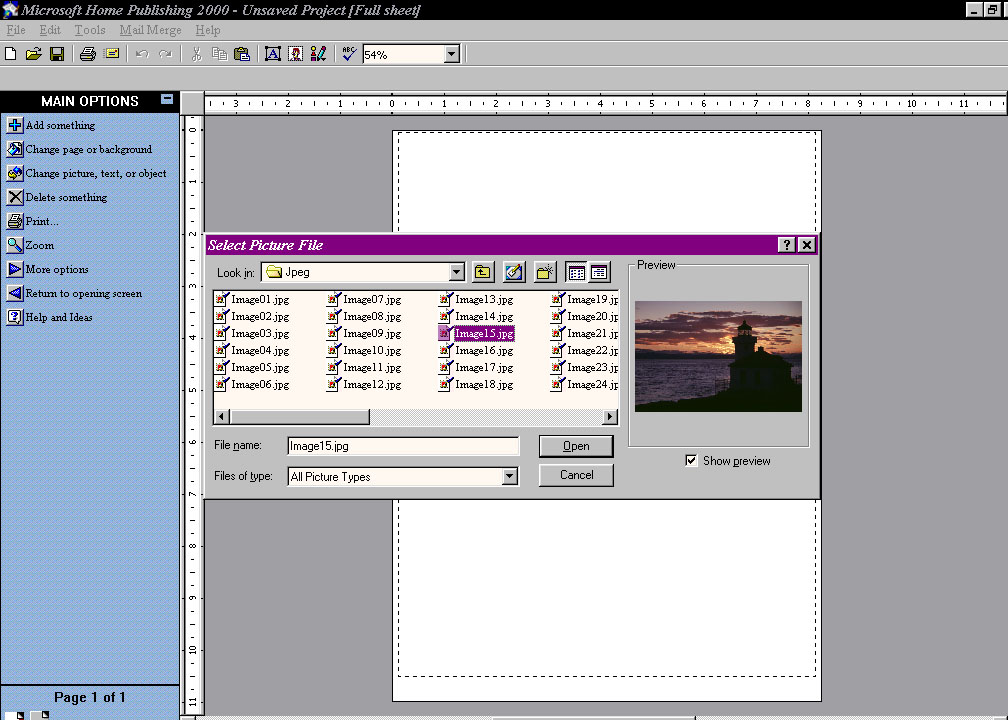
Open the lighthouse image CD, select an image, and then open it.
Step 5 - Edit the picture |
Step 5 |
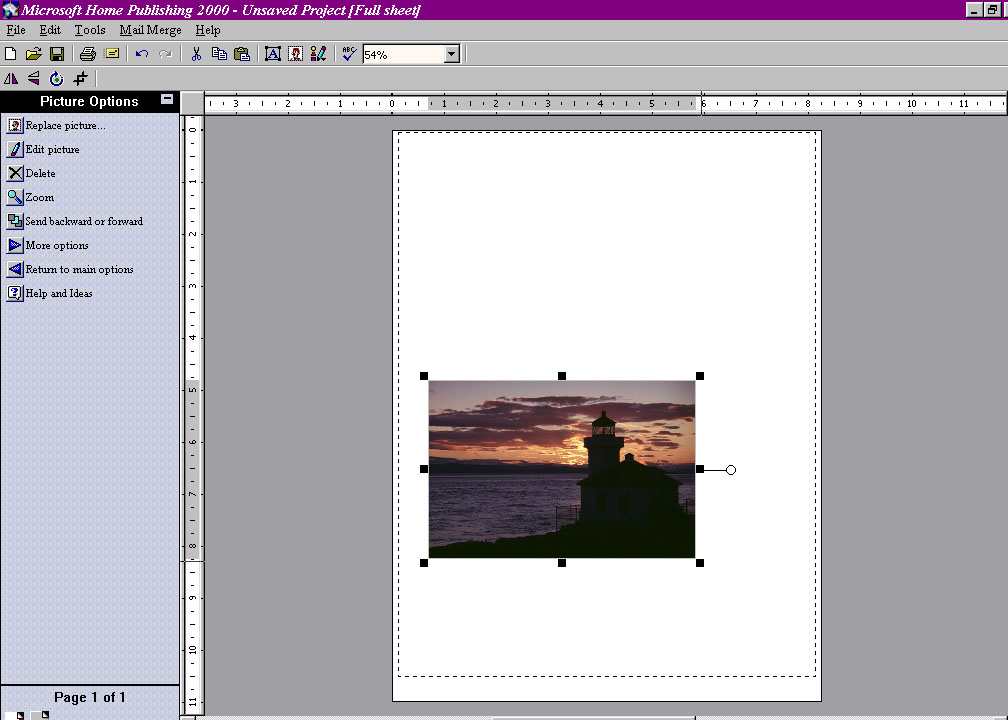
After you open the image, you may want to alter it. In this case, it would be nice to lighten it a little.
Step 6 - Brightness and color |
Step 6 |

With the picture selected, you can edit it. Because we want to lighten this picture, click Brightness and color.
Step 7 - Use the sliders |
Step 7 |
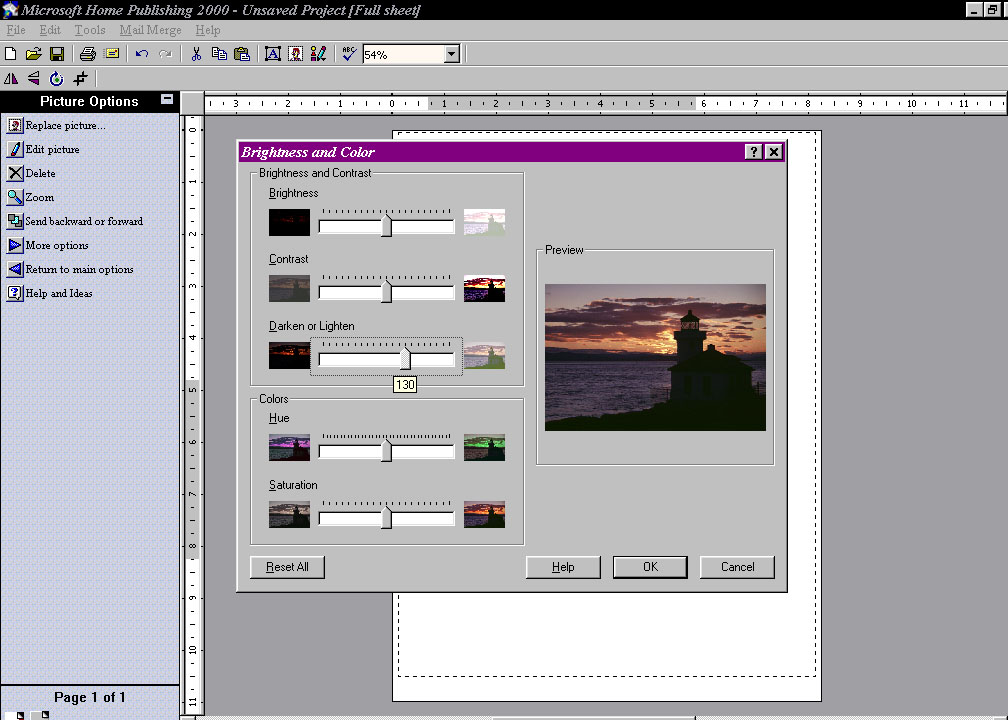
You can adjust the sliders until the picture has the look you want. When you have the picture the way you want it, click OK and the picture changes.
Step 8 - Resize the picture |
Step 8 |
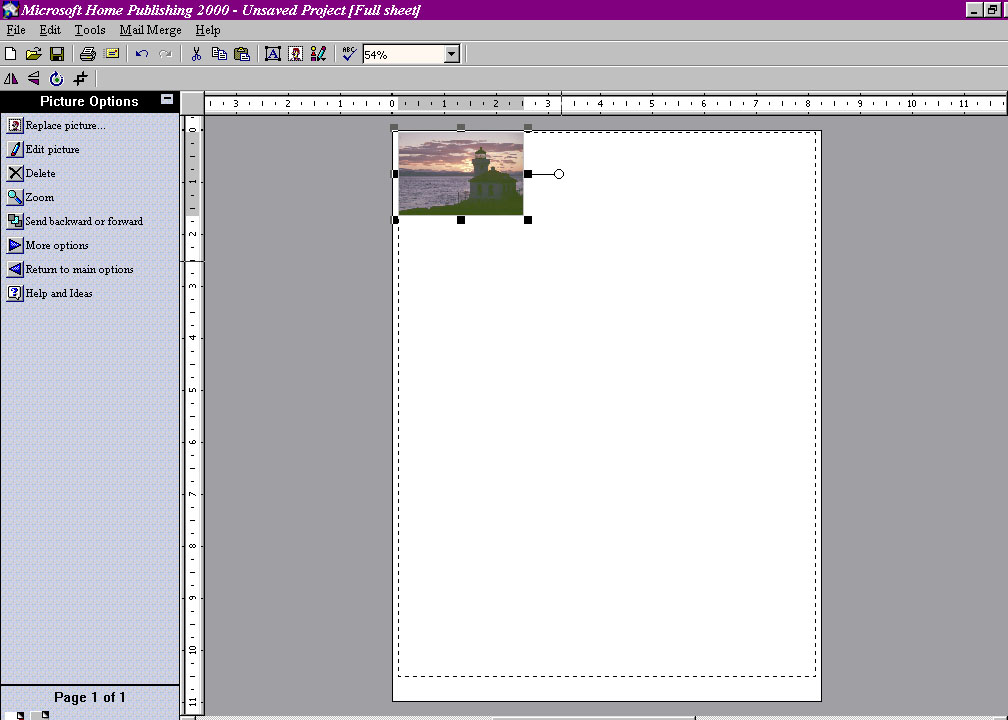
If you want many magnets on one page, you need to reduce the size of the picture. One way is to move the picture up to the corner of the printer margins. Then grab the bottom right corner and reduce the picture's size.
Step 9 - Zoom in |
Step 9 |
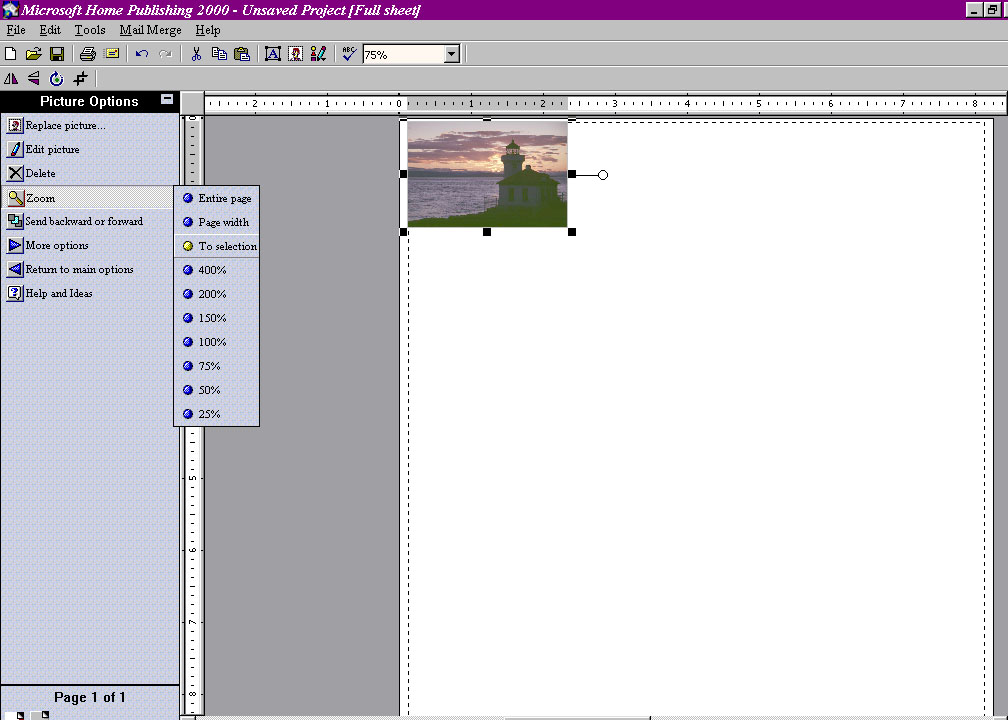
So you can see what you're working on, use the Zoom tool and click To selection. This will fill your screen with the selected image.
Step 10 - Drag a corner |
Step 10 |

To make your size adjustments for height, drag the corner box up and down. Make sure that the cursor is a little diagonal double-ended arrow before you start dragging. If it is, then you'll resize the picture. If, instead, the cursor is a little cross of double-ended arrows, then you'll move the picture.
As you drag the corner of the picture, an outline of the picture border will follow the mouse, keeping the correct width-by-height ratio (or aspect ration).
Step 11 - Drag a corner some more |
Step 11 |

You can adjust the width of the picture in the same way -- drag a corner, but move the mouse left or right, to make the image smaller or bigger.
Step 12 - Add some text |
Step 12 |
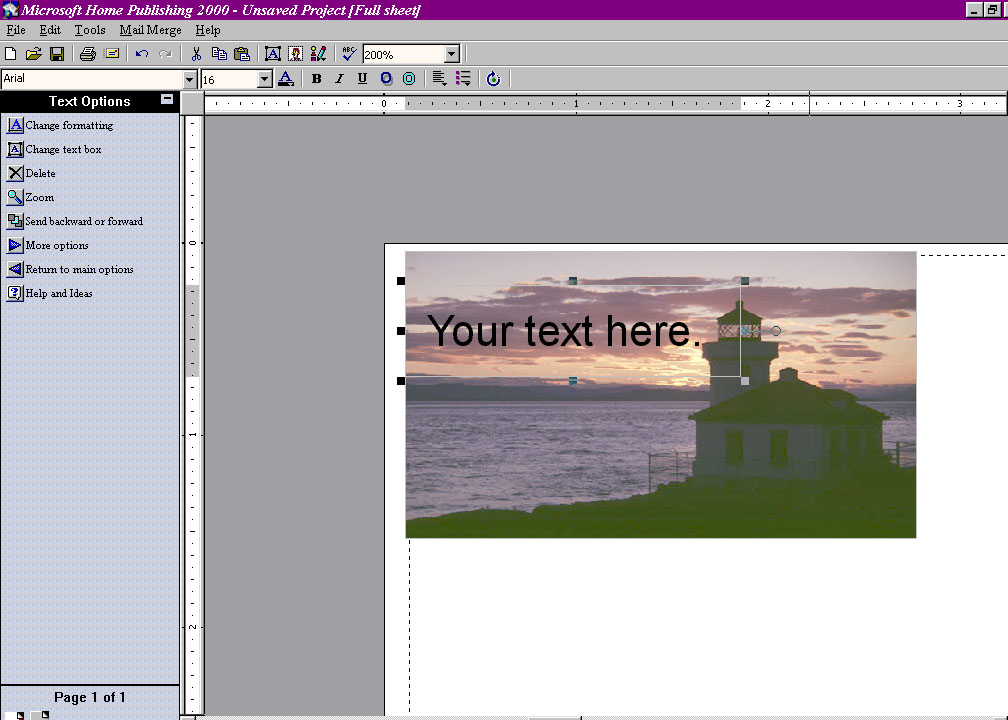
To add text to your picture, on the Main Options menu, click Add something, and then click Text.
Step 13 - Grouping |
Step 13 |
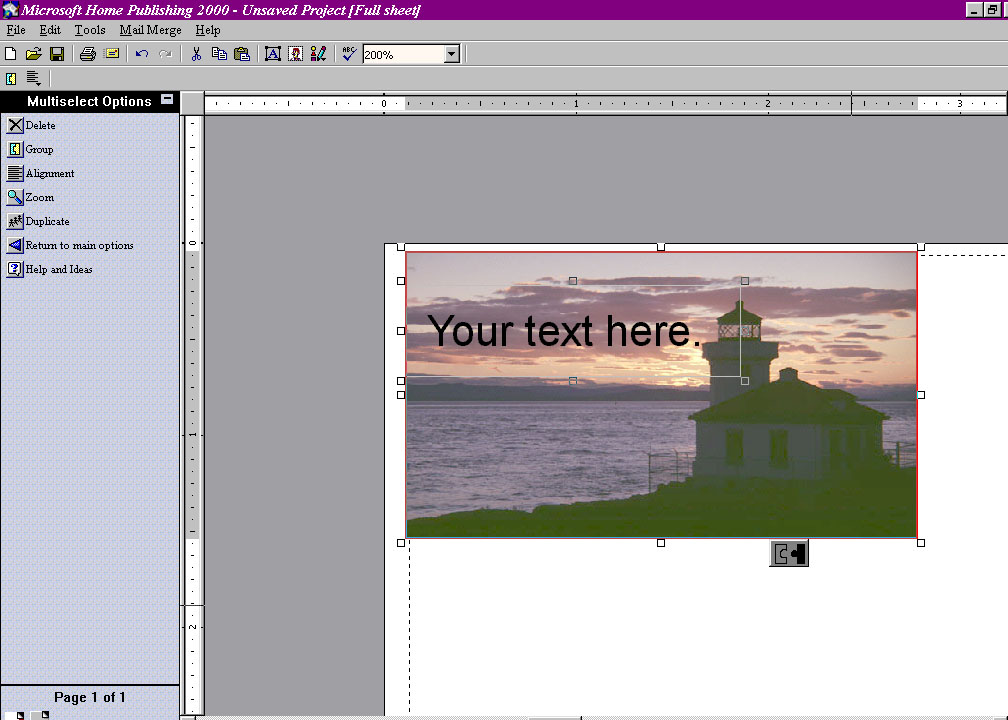
After you finish typing your text, you need to group the text and the picture. You can do this by selecting both the text and the picture. When both are selected, a puzzle piece icon appears. Click the icon, and your text and picture are grouped together.
Step 14 - Duplicate |
Step 14 |
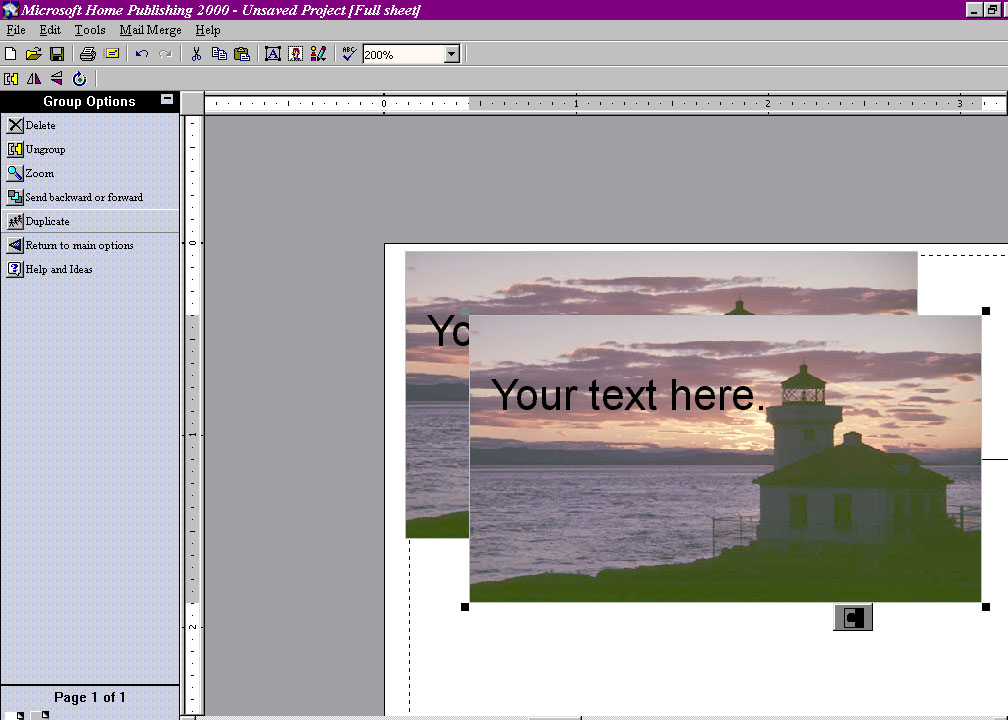
With the text and picture grouped together, you can use the Group Option of Duplicate to make as many copies as you want.
Step 15 - Arrange on sheet |
Step 15 |
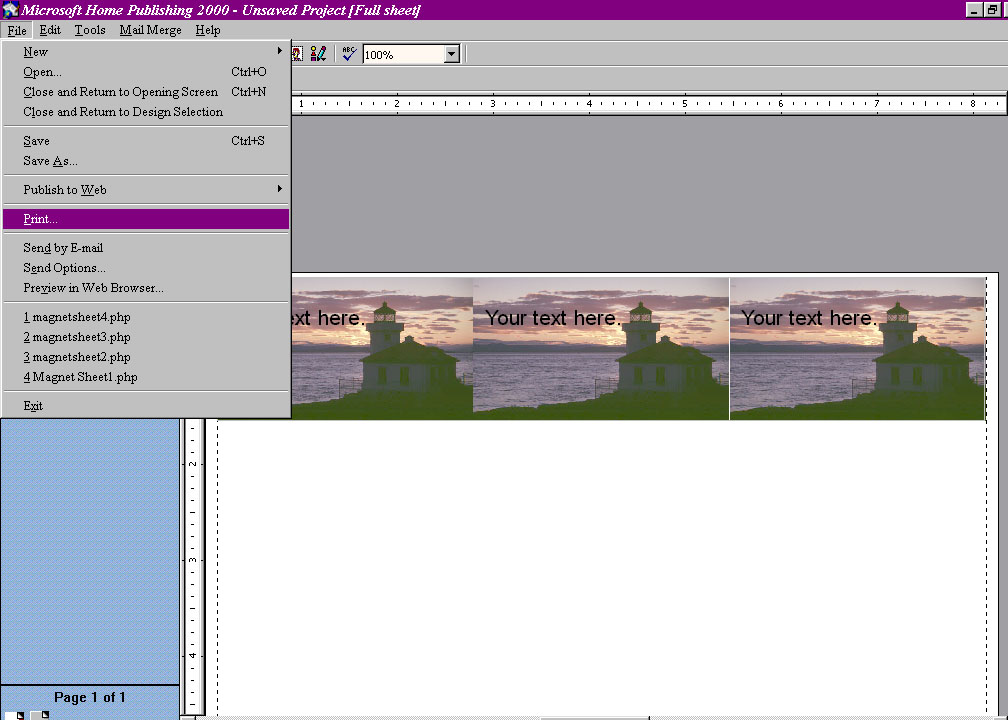
Arrange your images carefully to make cutting easier. You can simply click-and-drag the magnet images to wherever you want them on the sheet. We usually leave about a 1/16 of an inch between each magnet on the page.
By now, your Home Publishing file should be full of magnet images. Print your test page, make sure that everything looks okay, and print on your magnet sheet. You're done!
